
eLinehub is a pure-software remote vehicle diagnostics and programming platform. It maps your on-site VCI hardware to a remote Technician’s computer over the internet — the Technician’s OEM diagnostic software recognizes your device the same way it would if the VCI were plugged directly into their desk. No additional hardware is required on either side, and you do not need any OEM diagnostic software installed on your own computer.
For repair shops, this means access to specialist-level diagnostics and ECU programming on demand, without needing an expert on-site. This guide covers everything you need to install the eLinehub Mechanic software, connect your VCI, and start a remote session with your Technician.
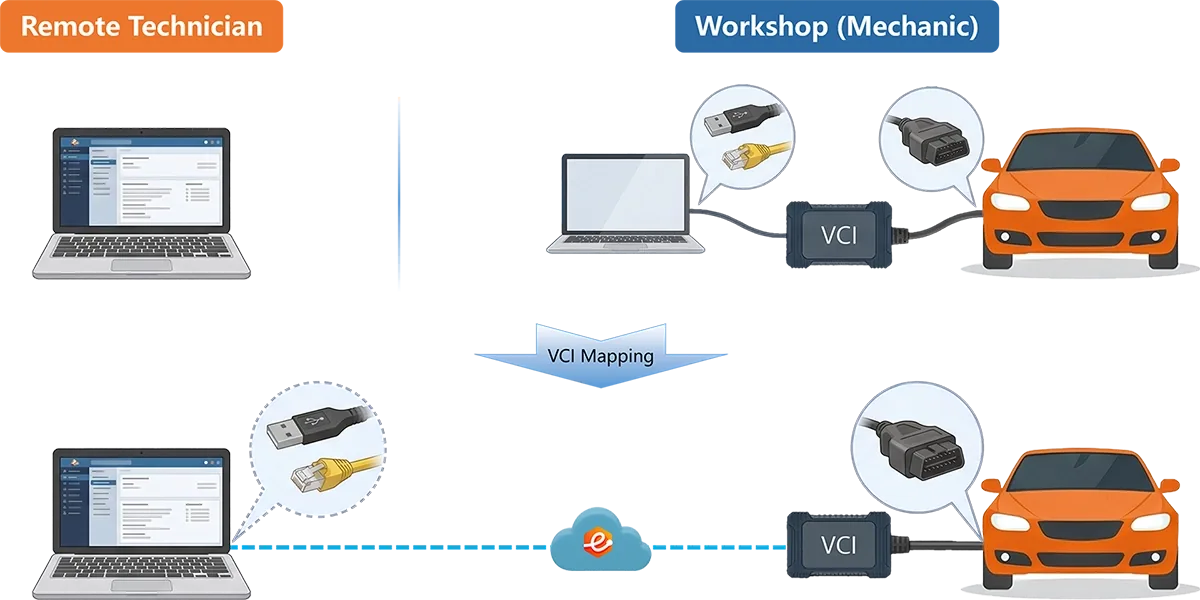
Are you a Technician setting up the specialist side? This guide is written for the repair shop (Mechanic). If you are the remote programming specialist, see the eLinehub Technician User Guide instead.
Before You Start
Make sure you have the following ready before working through the steps below:
- A Windows PC (64-bit, Windows 7 or later) — eLinehub Mechanic runs on Windows only; Mac, Linux, and Android are not supported.
- Your VCI device — USB-type or DoIP/Ethernet-type, plugged into the vehicle before you create an order.
- A wired internet connection — strongly recommended; Wi-Fi can disrupt DoIP diagnostic protocols mid-session.
- Your Technician’s contact — you will need to send them a Passcode in Step 5.
Step 1: Download and Install
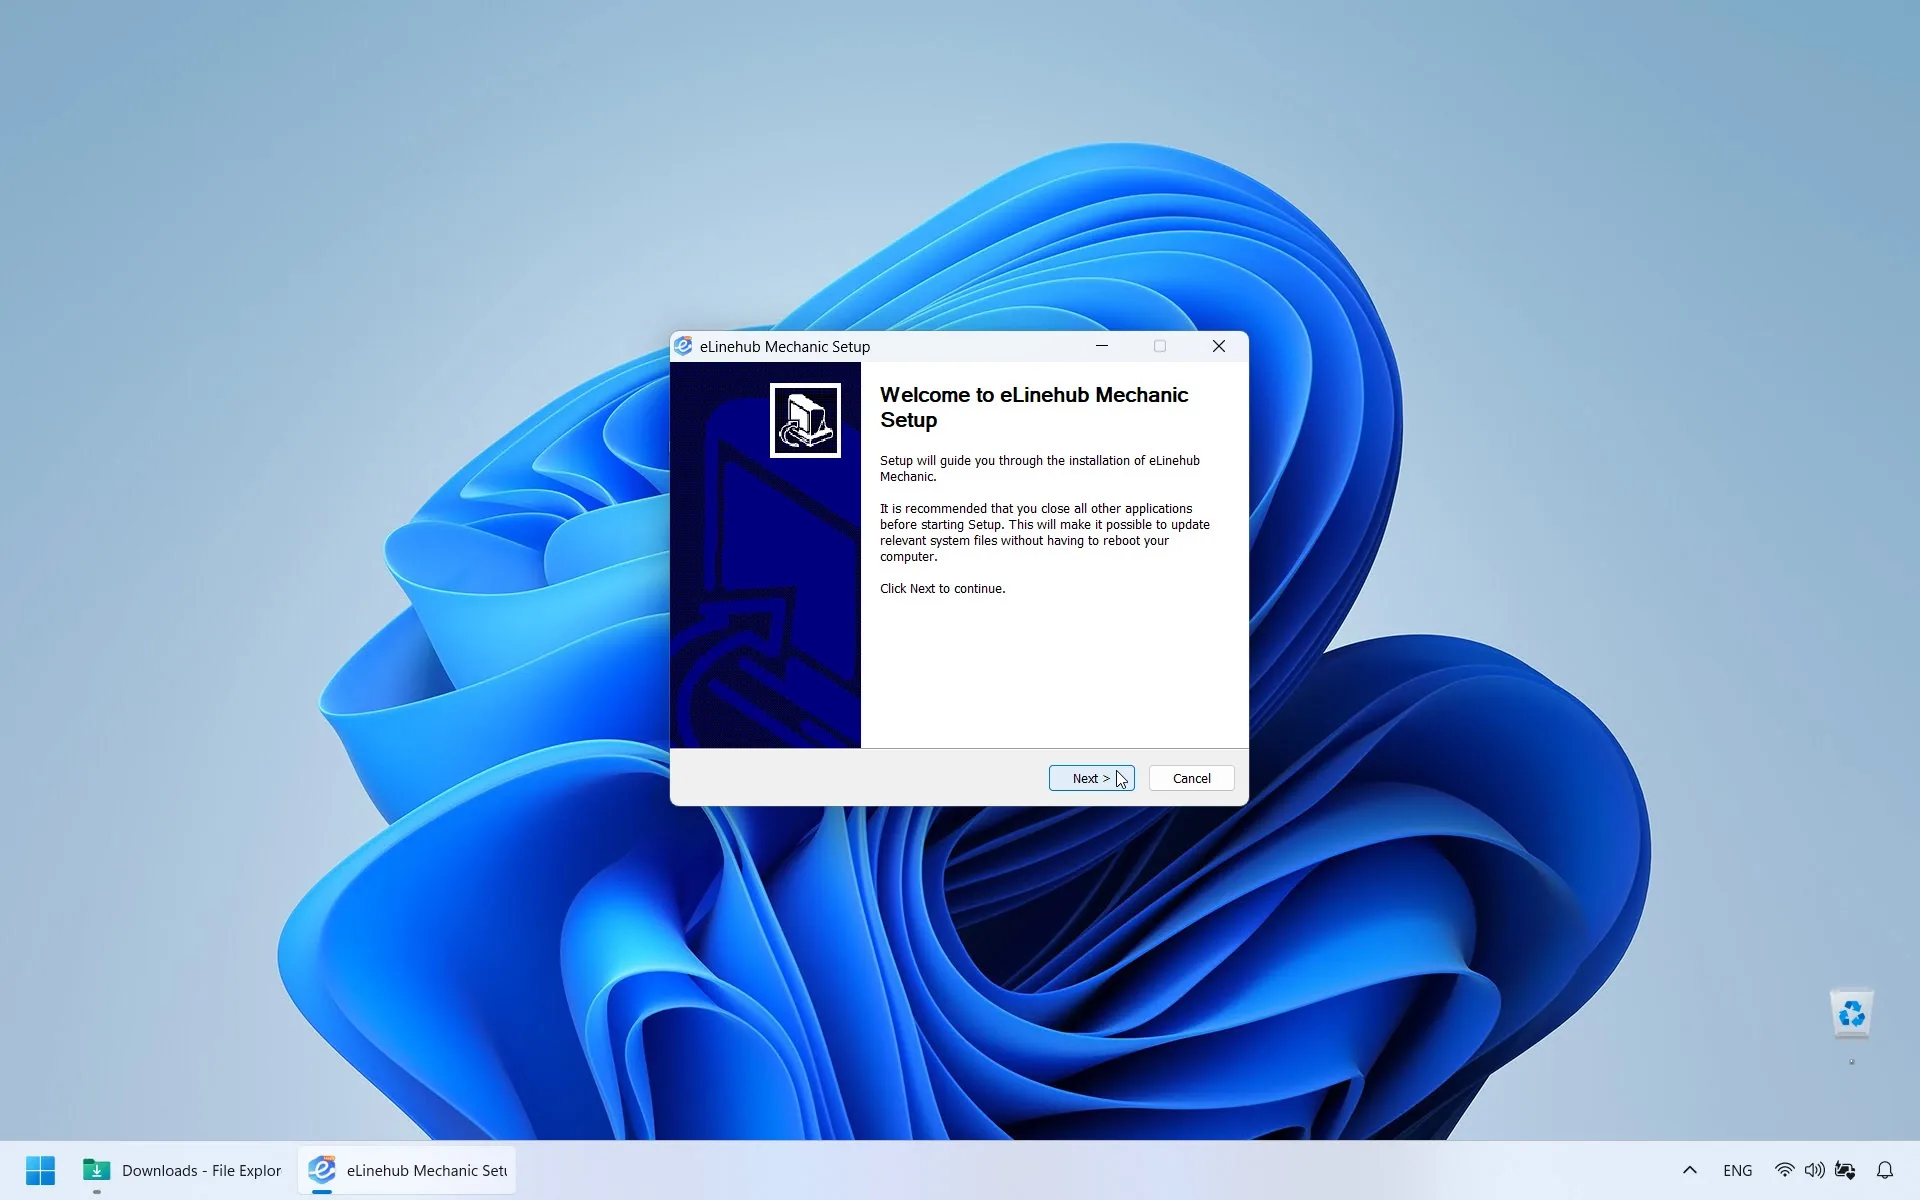
Download eLinehub Mechanic from the official eLinehub website. Once the download is complete, double-click the file and follow the on-screen prompts to finish installation.
System requirement: Windows 7 or later (64-bit). Windows 10 / 11 is recommended.
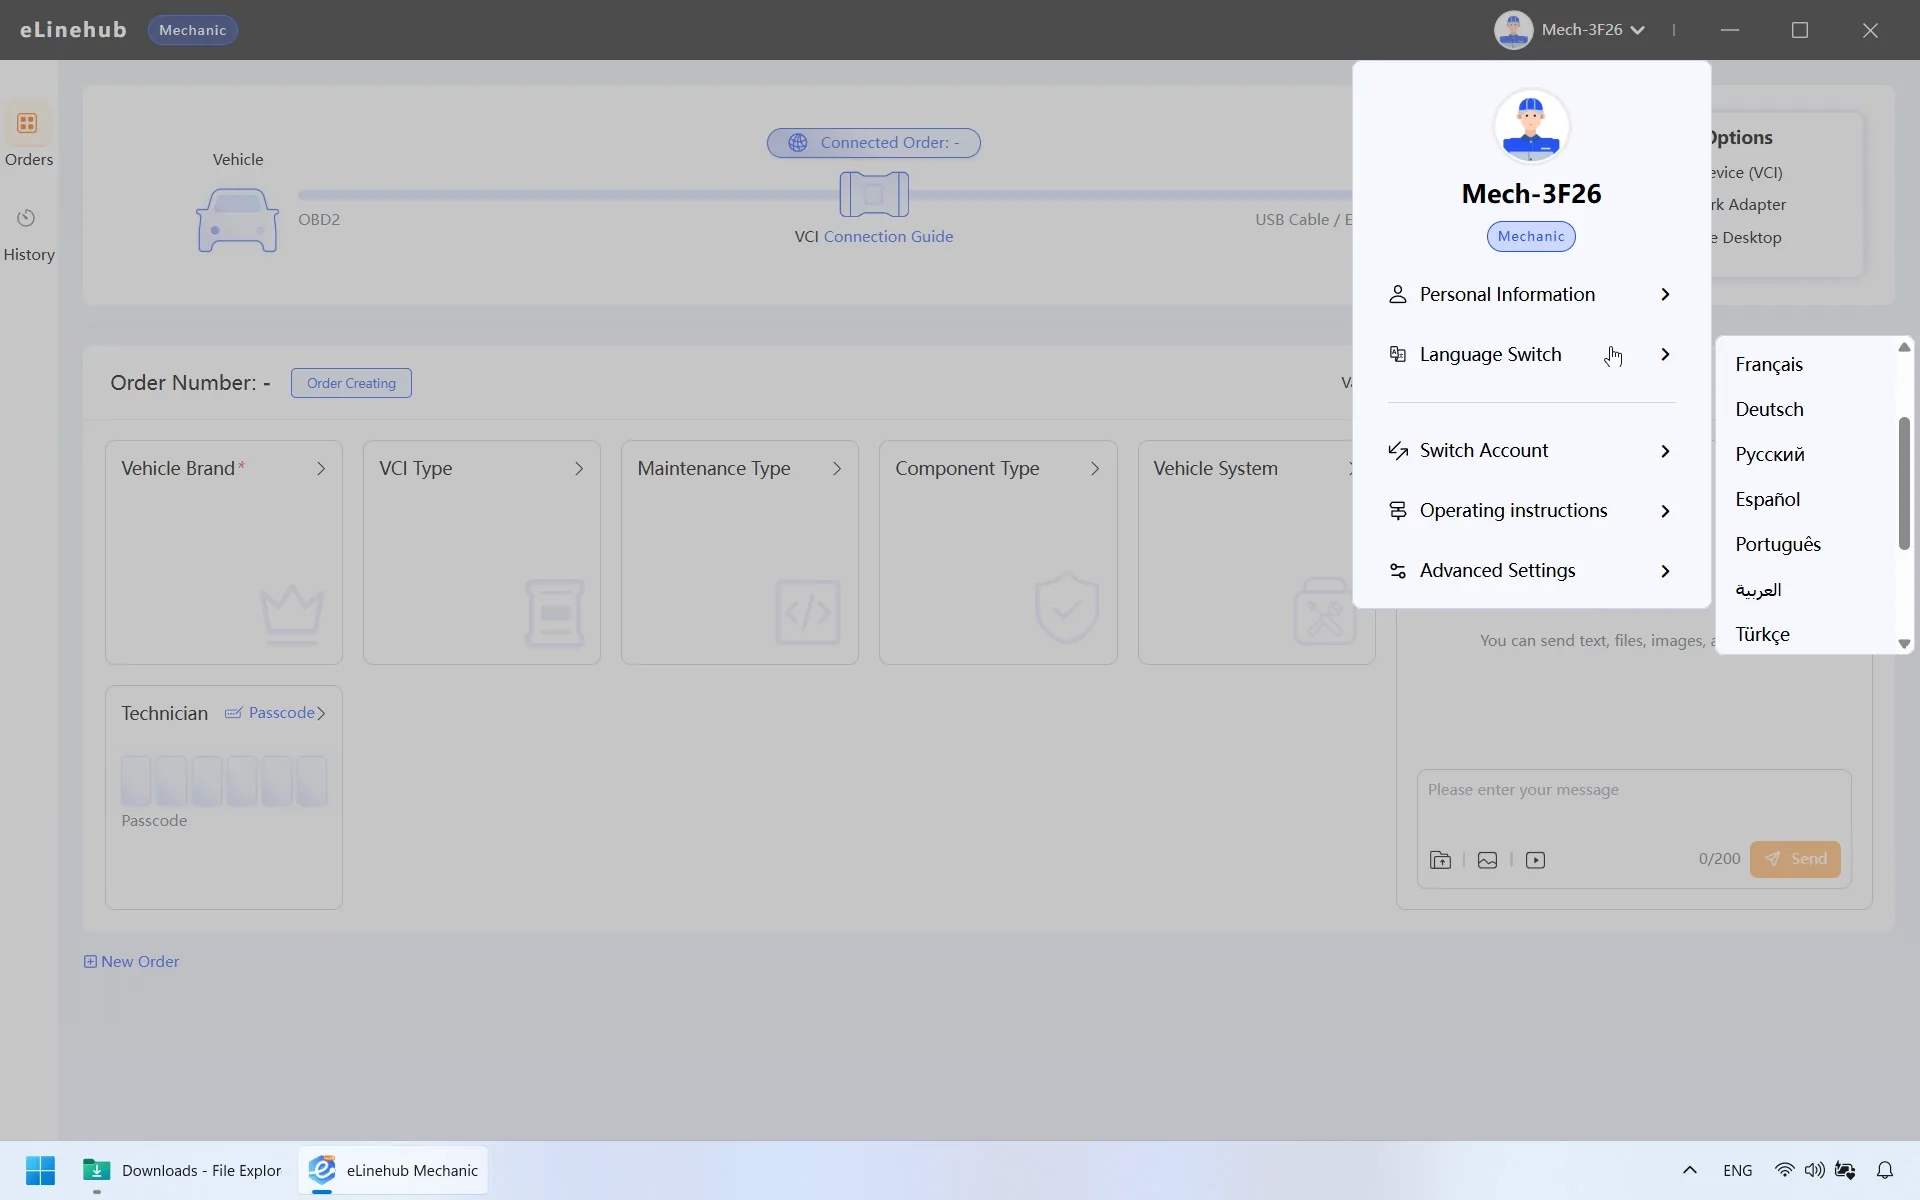
Multilingual support: The software supports multiple languages including German, French, Russian, Spanish, Traditional Chinese, and more. Switch your preferred language from the settings menu after installation.
Step 2: Open the Software — No Account Required
eLinehub Mechanic works without registration. Open the software and you’re ready to go.
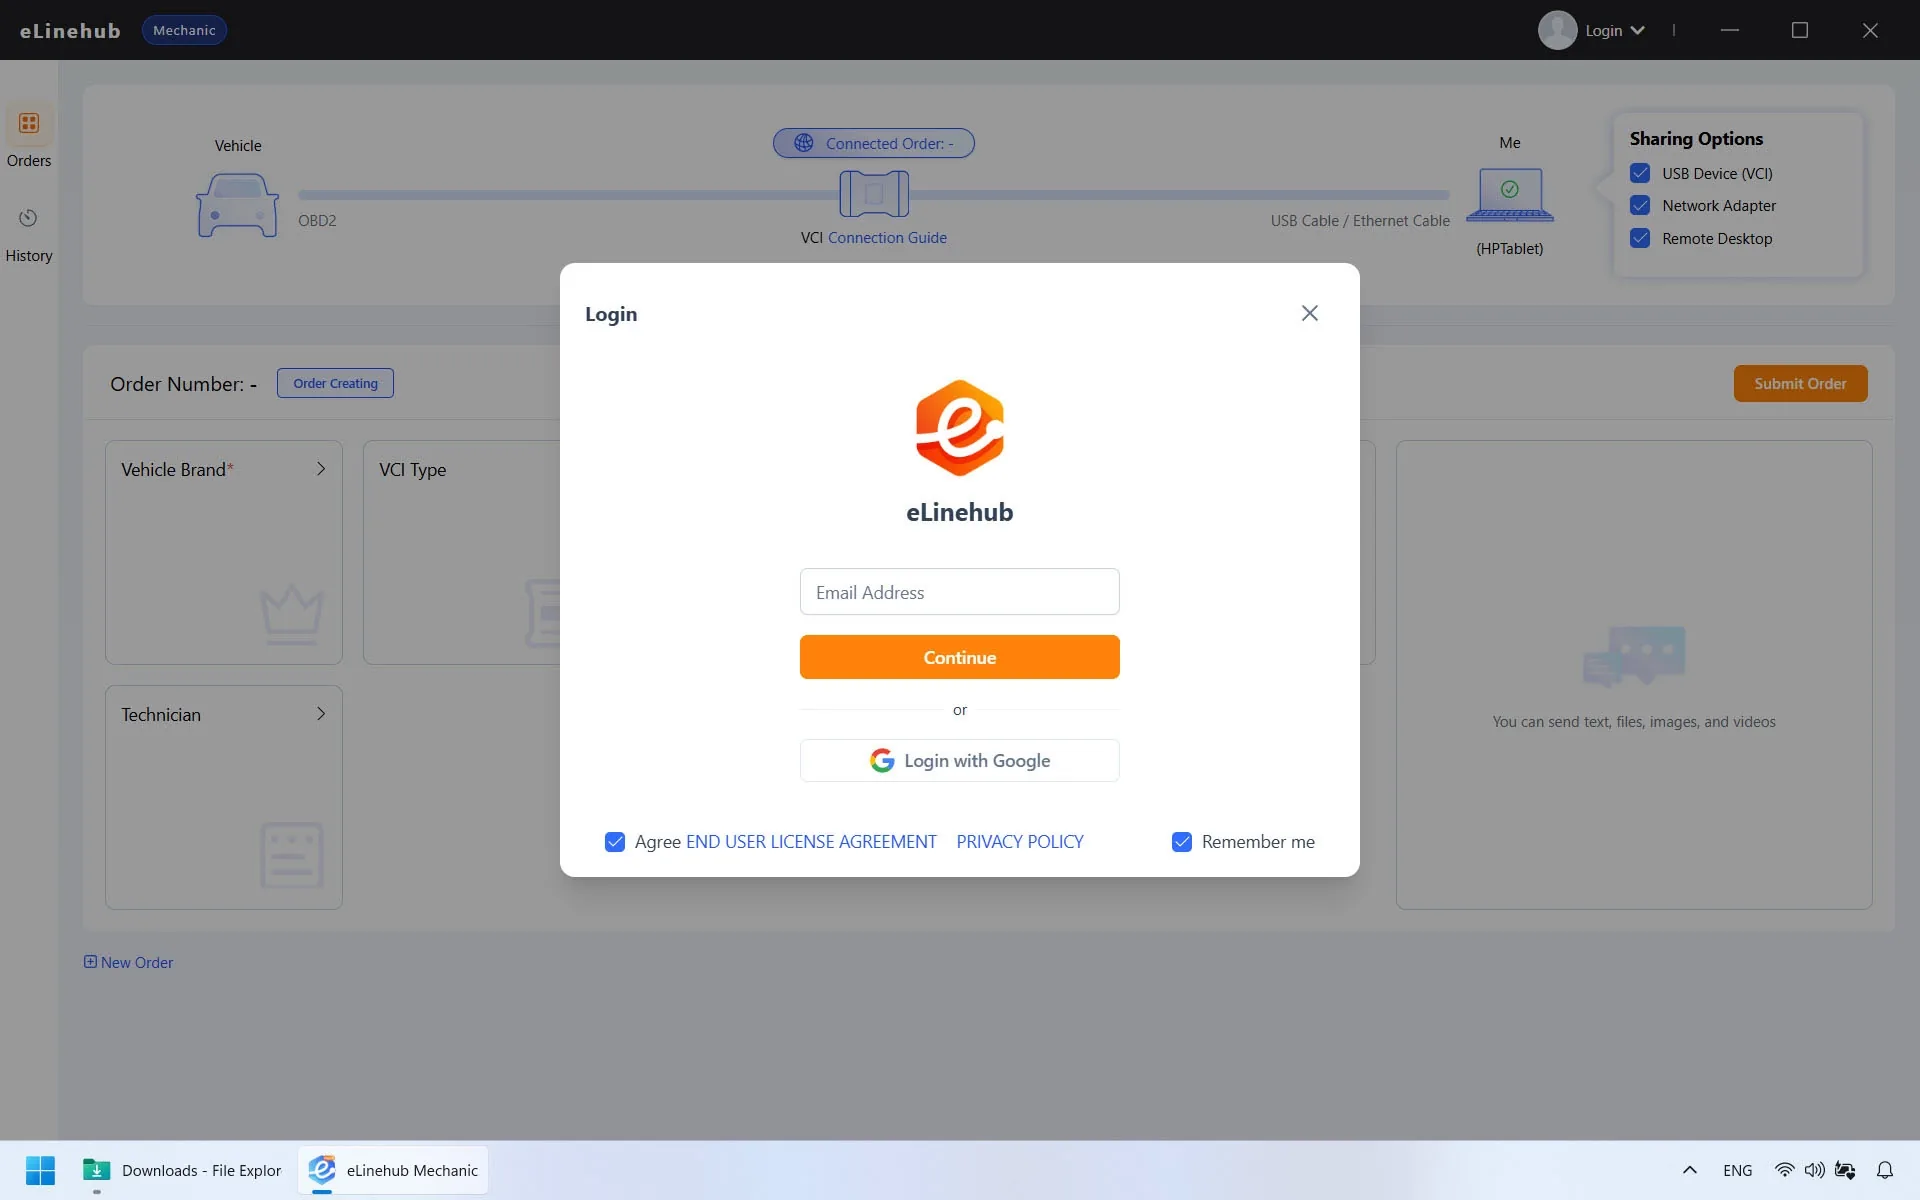
If you prefer to keep a synchronized history of your remote diagnostic sessions, you can optionally register and log in:
- Enter your email address and click Continue.
- Enter the six-digit verification code sent to your email.
- Fill in your country and state.
- Review and accept the user agreement, then click Confirm.
Step 3: Connect Your VCI and Check Your Network
Before creating an order, set up your hardware and verify your connection.
VCI Connection
Connect your VCI (USB-type) or diagnostic network cable (Ethernet / DoIP) to both your vehicle and your computer.
- Standard USB diagnostic devices do not require driver installation — Windows recognizes them automatically.
- RNDIS-based devices (used by certain DoIP-capable VCI adapters) require the corresponding RNDIS driver. If your VCI connects via a network cable rather than directly by USB, or if it appears as a network adapter in Windows Device Manager rather than a USB device, it is likely RNDIS-based — install the driver as a precaution. It does not affect non-RNDIS devices.
- You do not need any OEM diagnostic software — such as ODIS, XENTRY, or ISTA — installed on your computer. All diagnostic operations are carried out by your Technician on their end.
Network
- A minimum upload speed of 10 Mbps is required on your side.
- A wired (Ethernet) connection is strongly recommended. Wi-Fi can introduce latency and packet loss that disrupts diagnostic protocols — DoIP-based communication in particular has strict application-layer timing requirements that an unstable wireless connection can easily violate.
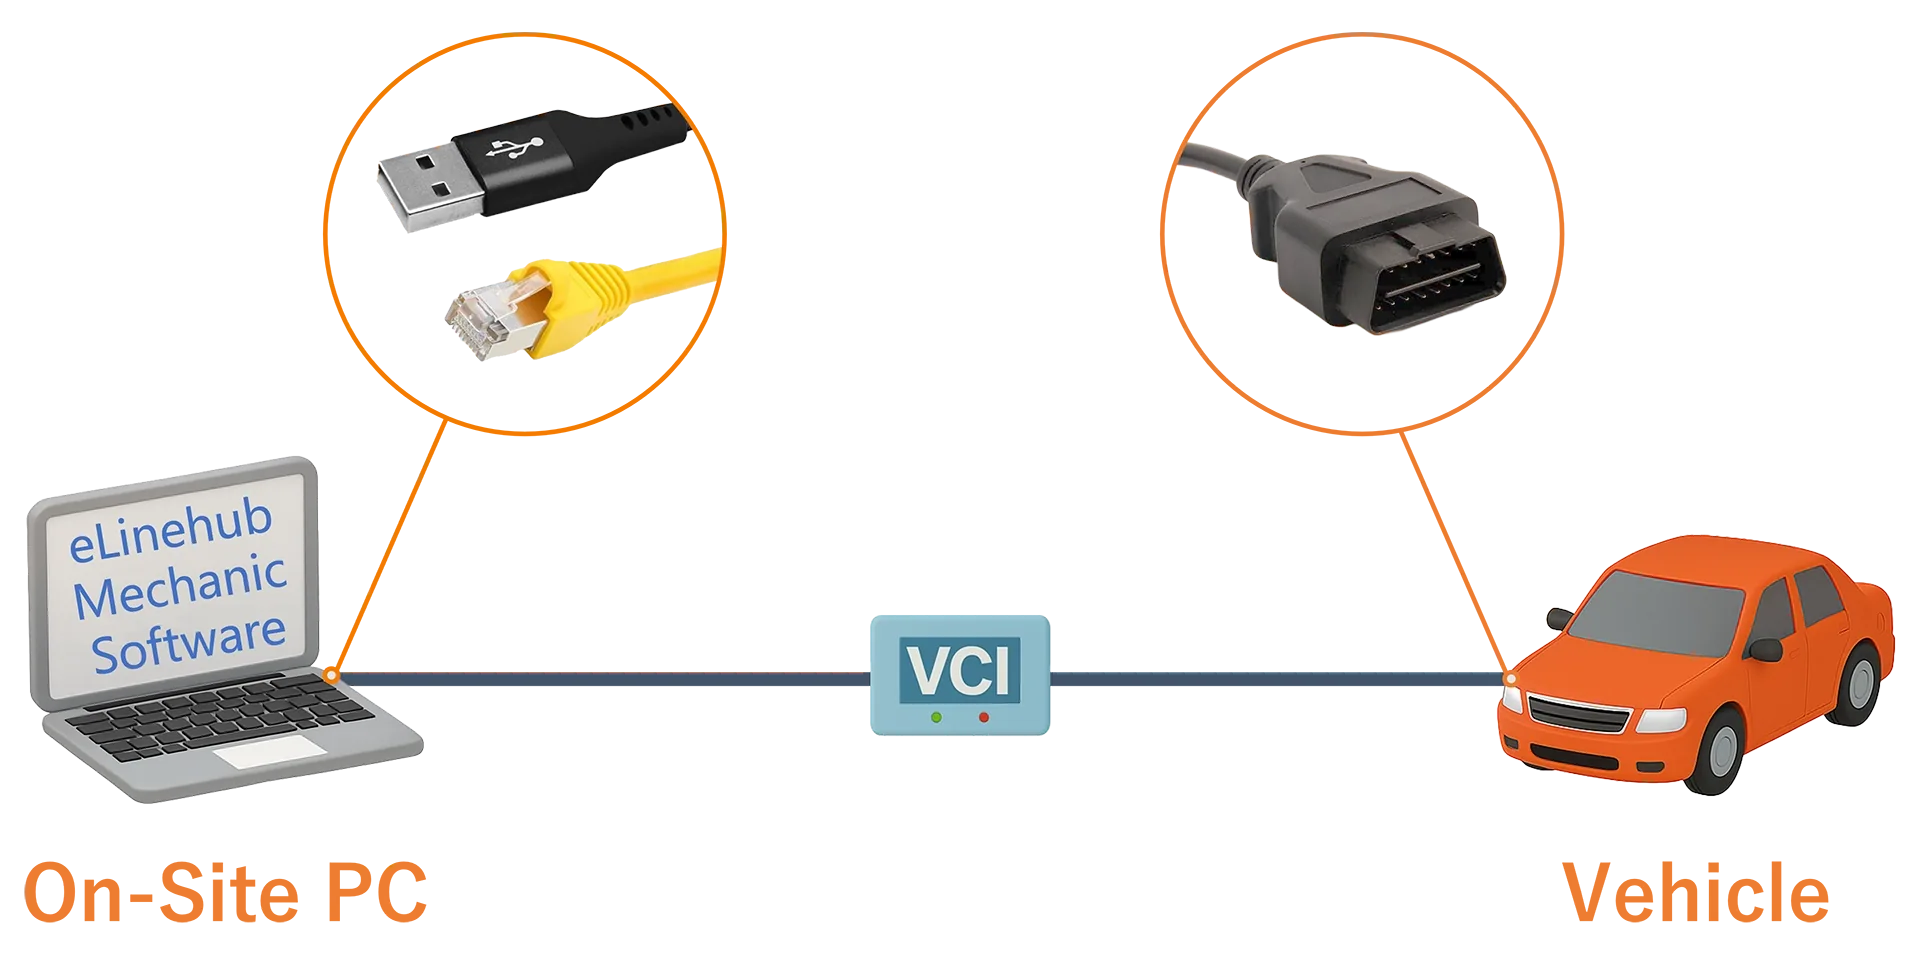
Not sure which VCI works with your vehicle’s brand? See the full VCI compatibility overview for a complete list of supported devices and platforms.
Step 4: Create an Order
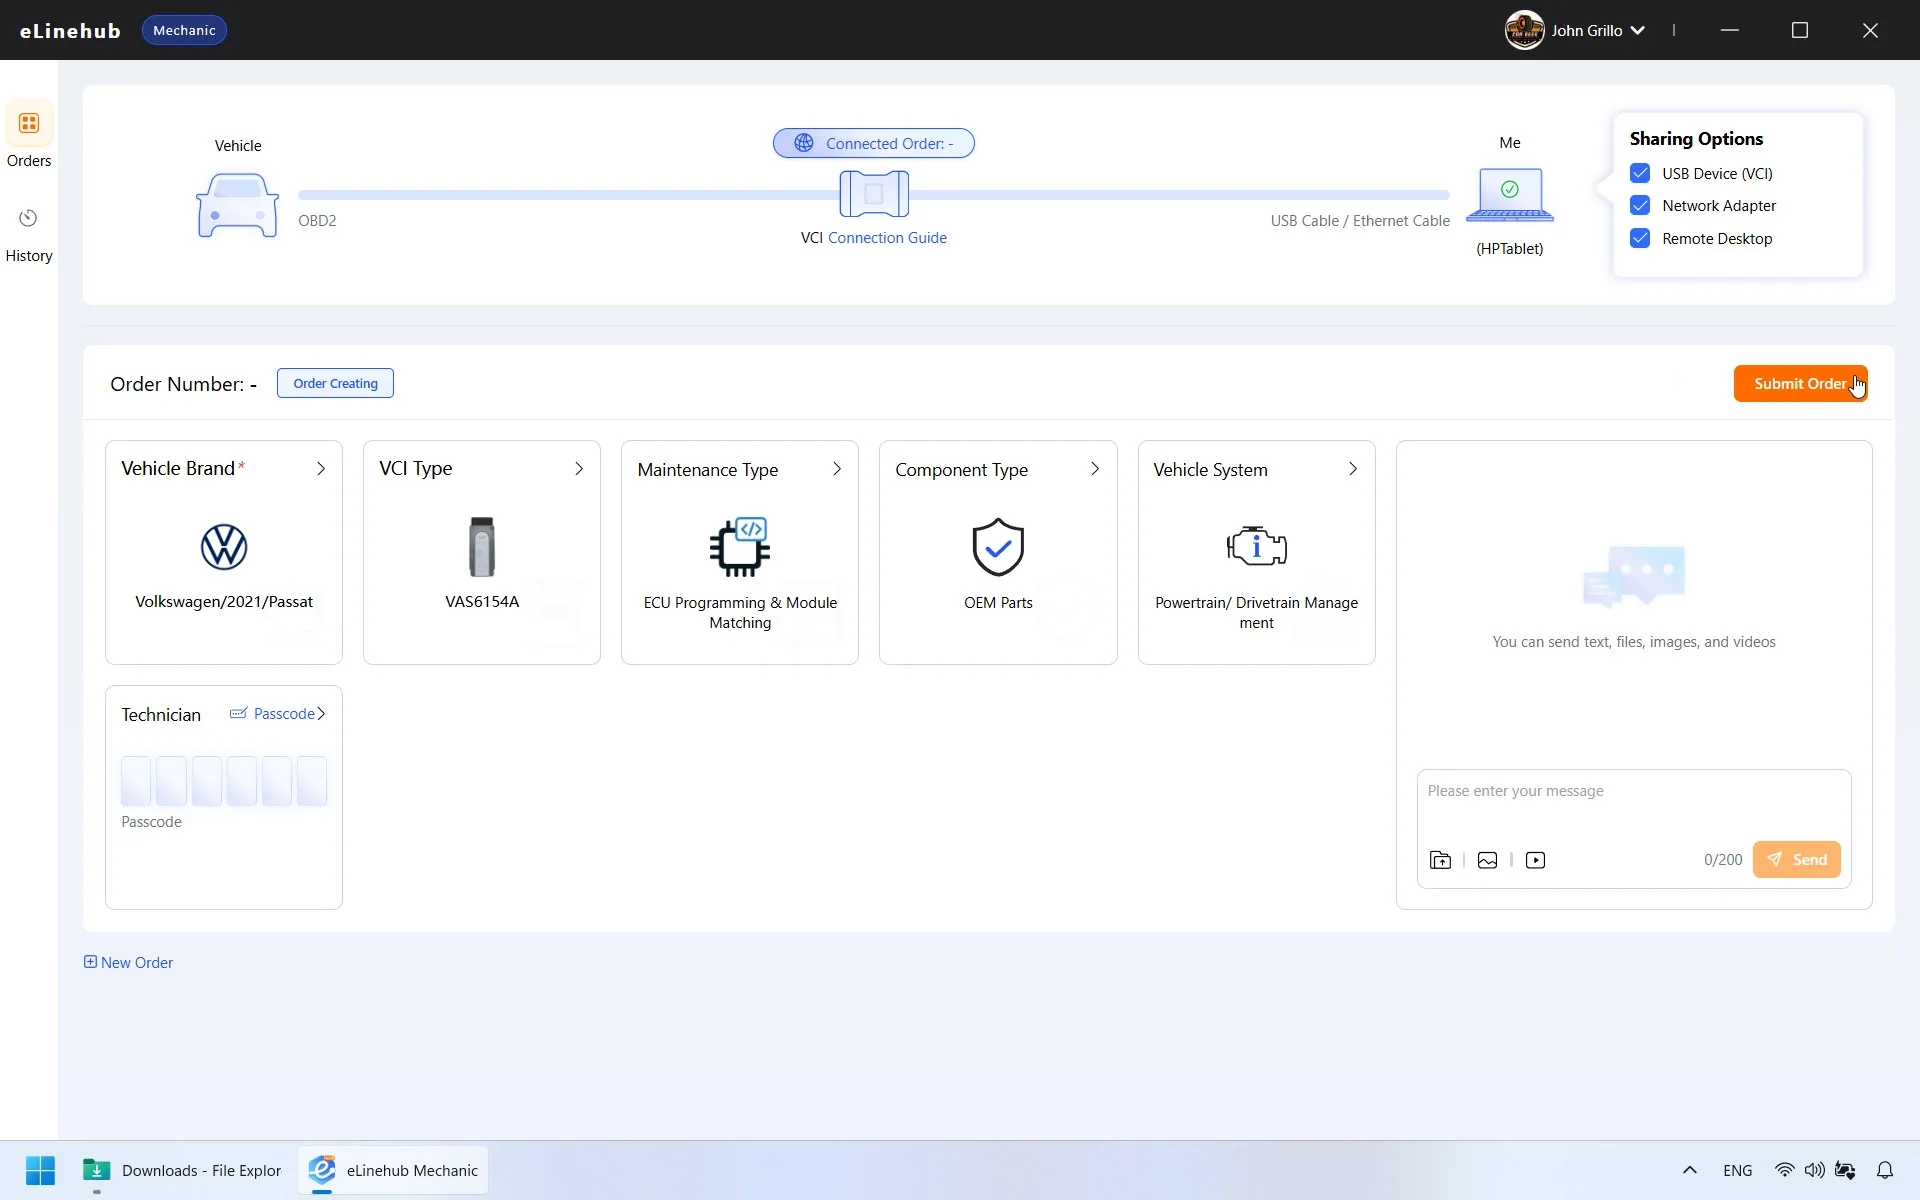
With your VCI connected and the software open, create an order for your Technician:
- Vehicle information (required): Select the vehicle make, year, and model.
- Optional details: Specifying the VCI device type, maintenance type, component, and vehicle system helps your Technician prepare — though none of these fields are mandatory.
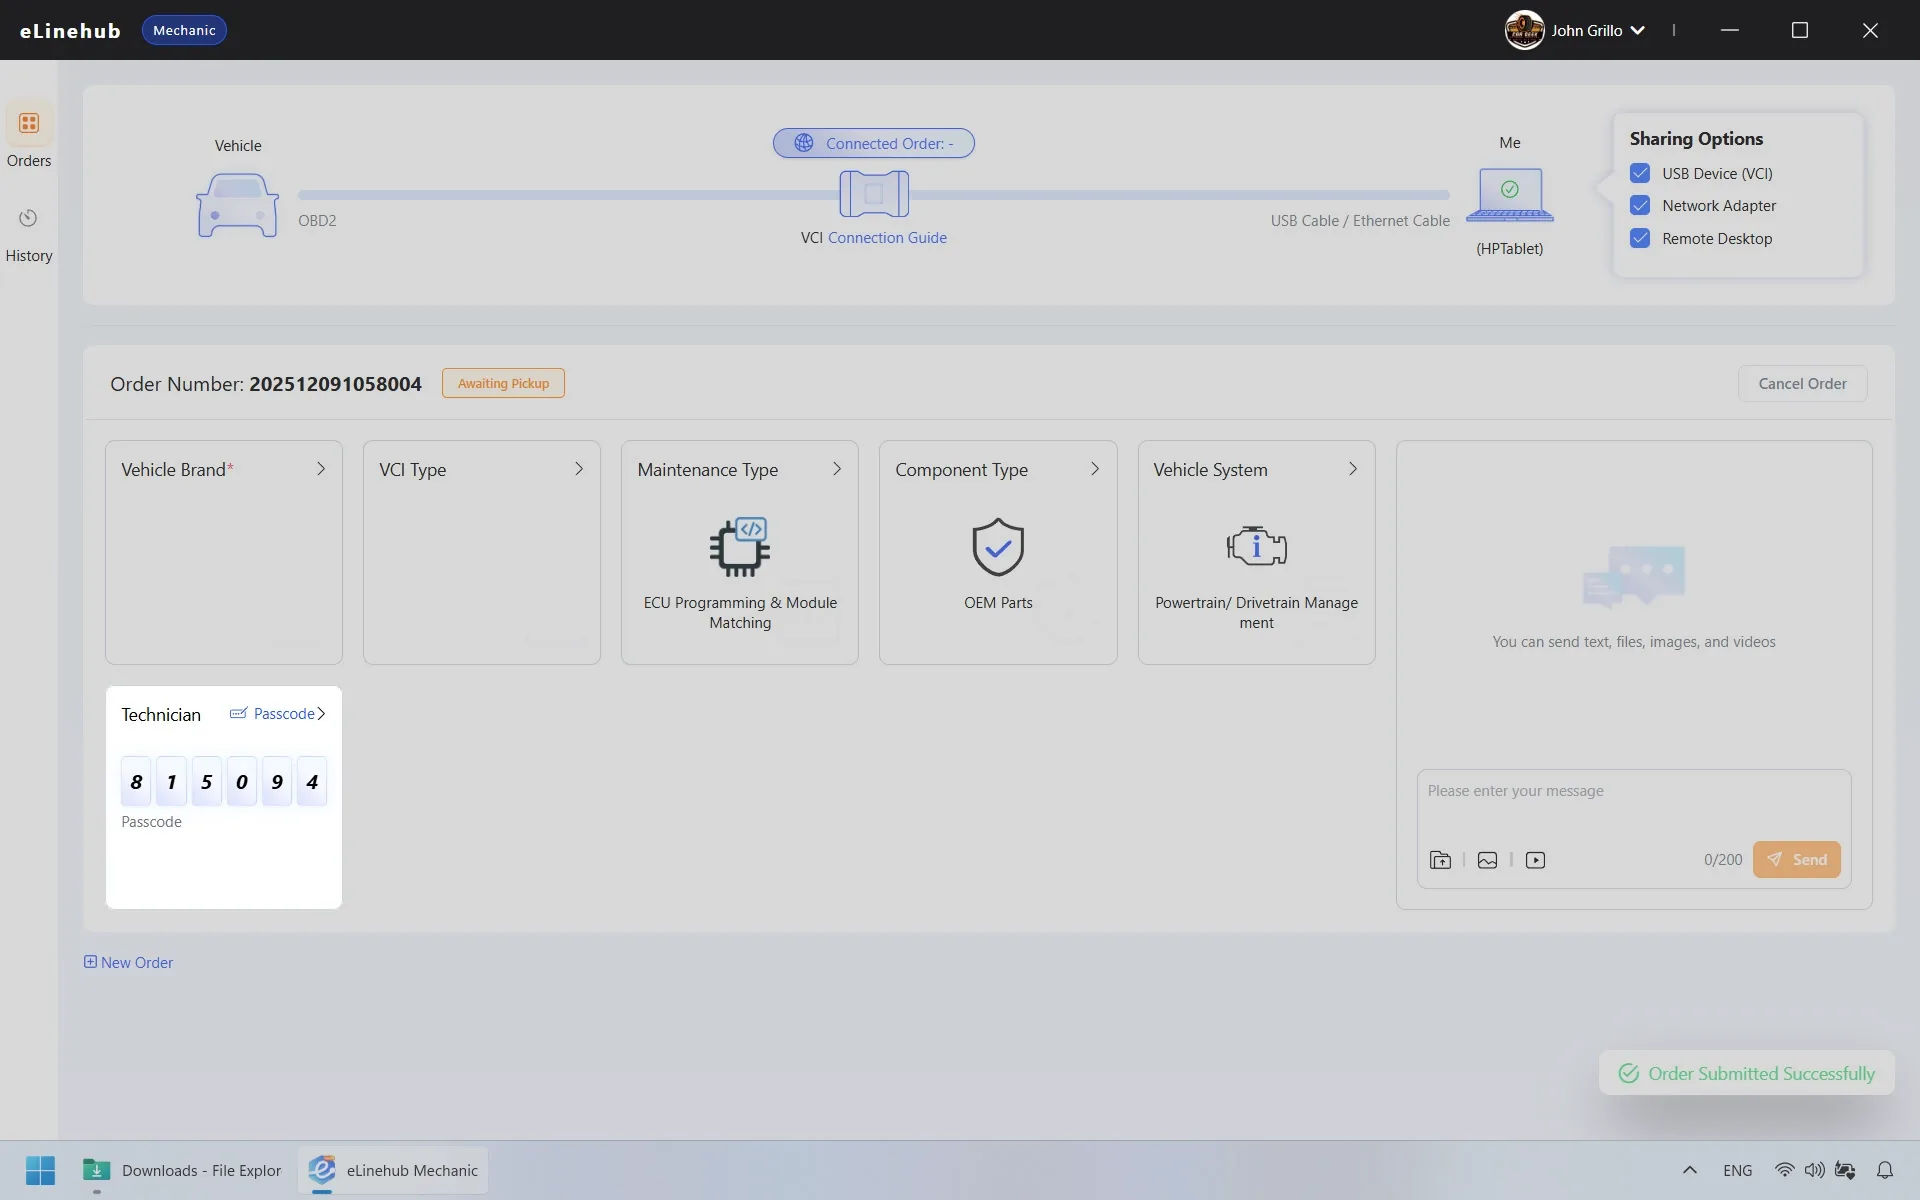
- Click Submit. The system will generate a secure, private Passcode for your order.
Step 5: Share Your Passcode
Share the generated Passcode with your Technician through your usual channel. When they enter it into their eLinehub Technician software, they will bind to your session.
If this is your first time working with this Technician, use the built-in Live Chat in the software — it is the most direct way to share the Passcode without switching to a separate channel. You can also share images, videos, and files through Live Chat to give your Technician additional context about the vehicle’s condition.
Step 6: The Remote Session
Your Technician will initiate the connection from their side. Once the secure connection is established, the lines between “Vehicle” and “Me” on your screen will turn green — confirming the session is live.
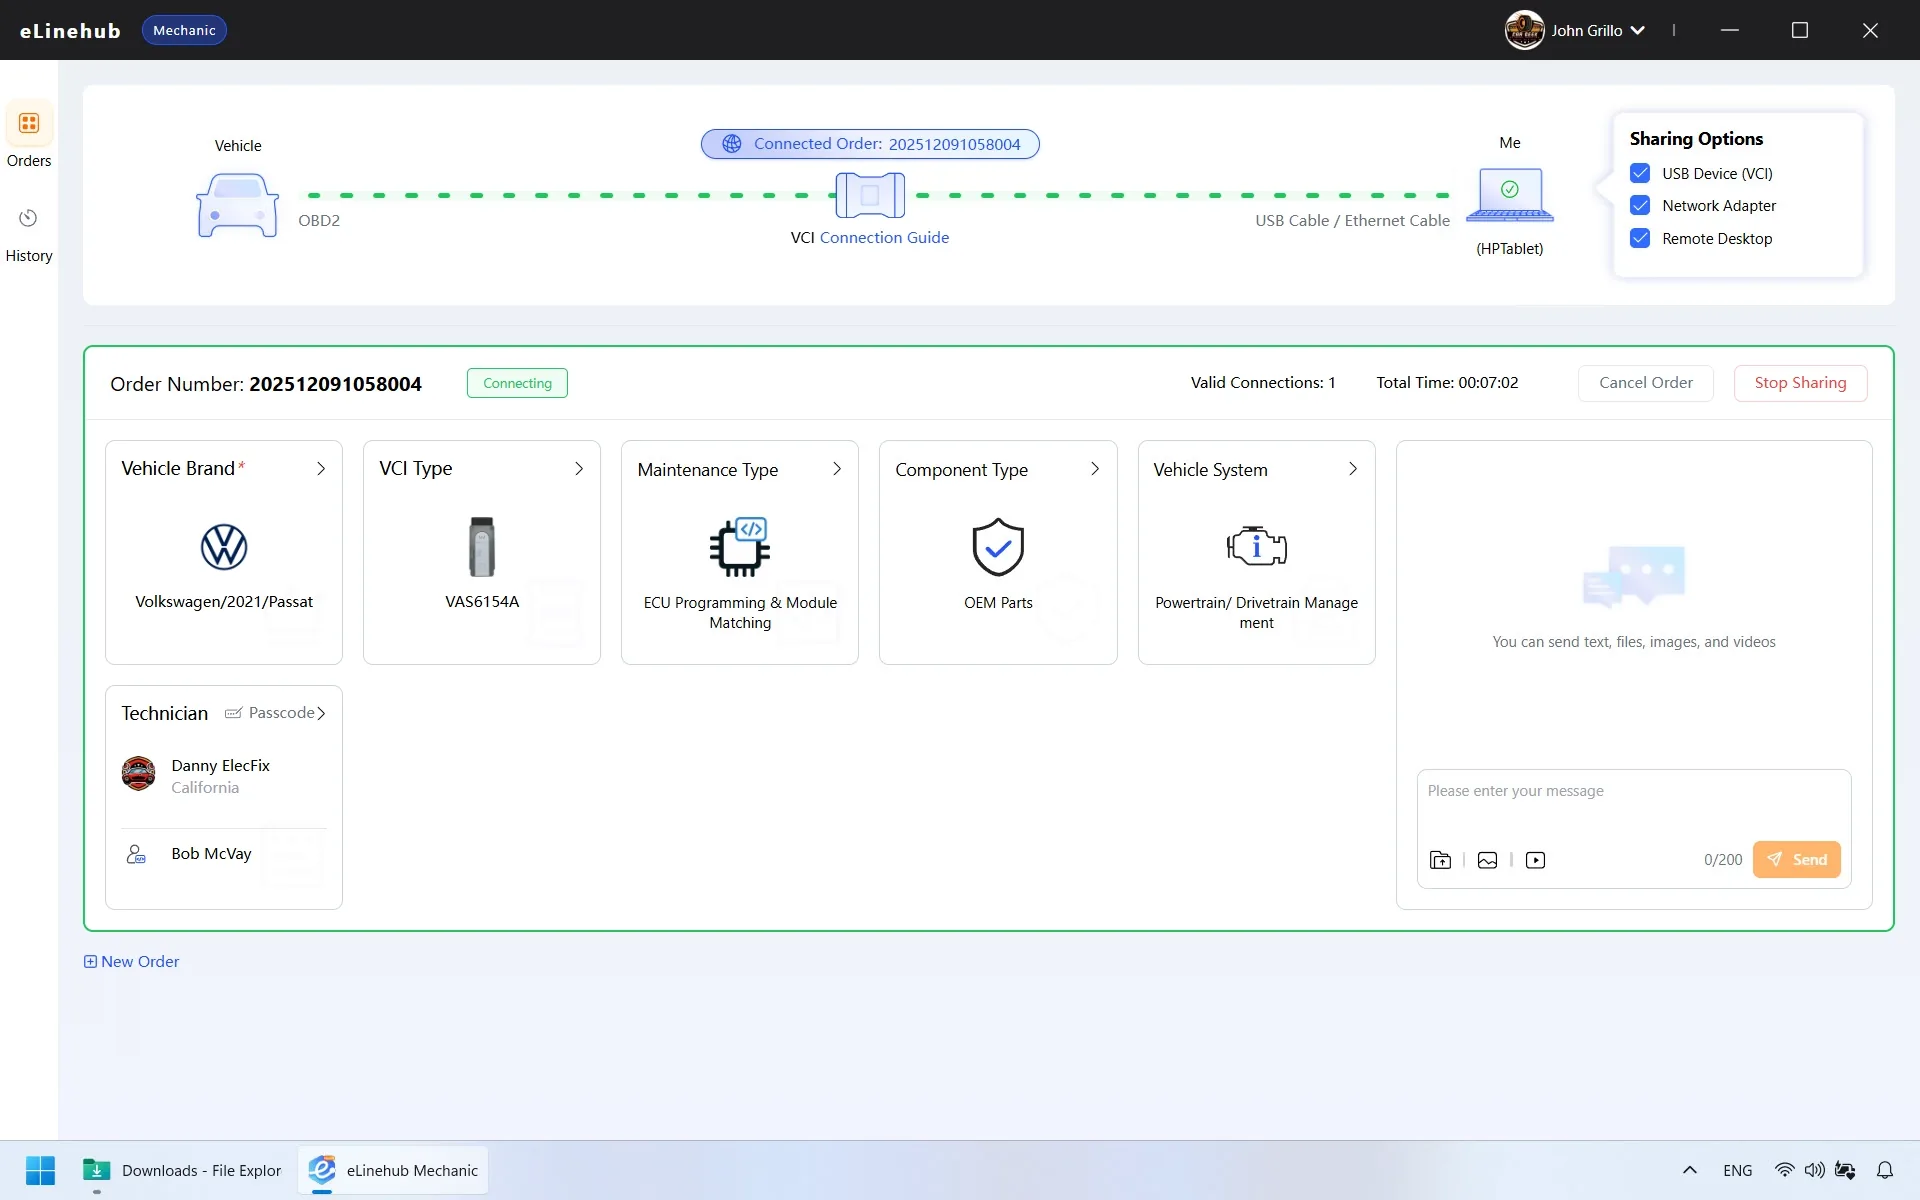
Allow a brief initialization period after the lines turn green. The Technician’s software needs a moment to register the VCI on their PC before they can open their diagnostic software. Do not disconnect or replug the VCI during this time — wait until your Technician confirms through Live Chat that they can see the device and are ready to proceed.
From this point, the session is managed entirely by your Technician. Keep the following in mind to avoid interrupting the session mid-job:
- Keep your VCI connected. Do not unplug the VCI from the vehicle or your computer until your Technician has finished and closed the connection on their end. Disconnecting the VCI during an active diagnostic or programming session can cause errors or leave the vehicle’s ECU in an incomplete state.
- Keep your computer powered. eLinehub automatically prevents your computer from entering sleep mode during an active session, but make sure your laptop is plugged in or has enough battery for the full job.
- Keep your internet connection stable. If you are on Wi-Fi and the signal is unreliable, switch to a wired connection before the session starts.
If your vehicle uses a DoIP-based VCI (common on BMW, Mercedes-Benz, VW Group, and other modern platforms): during the session, you may notice your PC’s general internet connection briefly interrupted while the diagnostic connection remains active. This is expected behavior — the Technician’s software manages network routing to maintain the diagnostic link. Do not attempt to replug the network cable or restart your router while the session is in progress.
Your Technician will close the session when the work is complete.
Step 7: Order Completion
When the work is finished, your Technician will close the connection and send a Complete Order request.
You will receive a prompt to confirm the job is done. If you are away from your computer or do not respond within the set period, the system will automatically confirm and complete the order. If you are registered and logged in, you can review all past sessions in your Order History.
Frequently Asked Questions
Are You the Technician? This guide covers the workshop (Mechanic) side of eLinehub. If you are the remote specialist — running OEM diagnostic software and accepting orders — the eLinehub Technician User Guide walks through account setup, VCI management, order acceptance, and session controls.